Originally posted on: http://geekswithblogs.net/SoYouKnow/archive/2009/01/19/a-complete-moronrsquos-guide-to-deploying-a-simple-site-across.aspx
Hi, I’m Mark and I’m a moron. Every time I think I have a handle on how to do even the most simple things in SharePoint I find out I have to jump through hoops to get things to work just right. I’m hoping someone out there reading this blog will leave a comment saying “Hey! You’re a moron, here’s how you SHOULD have done it!”. I won’t be offended, feel free to belittle me. I have no problems looking like an idiot if I’m learning something.
Again, this is a very basic, step-by-step blog. All you pro’s will find it boring, but please feel free to throw in your input.
What Happened This Time?
Now that we have three farms set up (Dev, Test, and Prod) I thought I’d create a really simple site with a SPD workflow in dev and then deploy it to Test and Prod so that we could check it off of our list of tests. Sounds simple enough? I’m sure you can do it without issue (In fact I HAVE done it before without issues on our old Single Server “Proof of Concept” farm). Well, I firmly believe if something is idiot proof they will create a better idiot. Let me take you down my little odyssey that ended up taking up most of my afternoon.
Step 1: I Created a Site
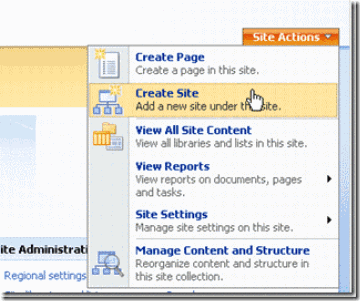
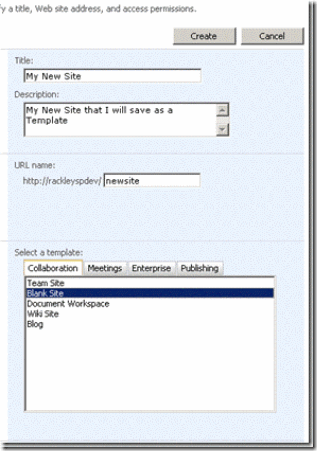
Don’t know how to create a site? Two simple ways (simple is good).
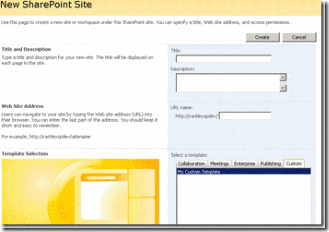
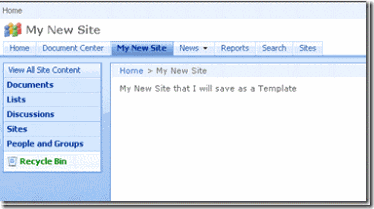
Create site in SharePoint
|
|
|
|
|
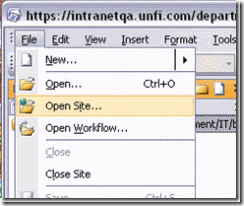
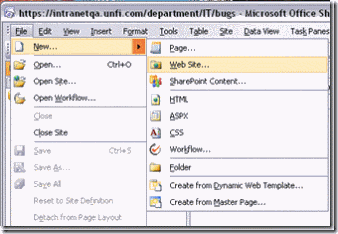
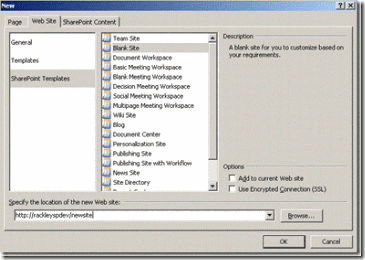
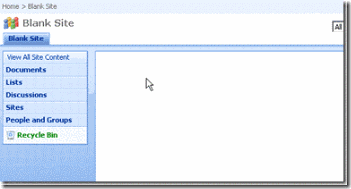
Create site in SharePoint Designer
|
|
|
|
|
|
|
Step 2: I Saved My Site as a Site Template
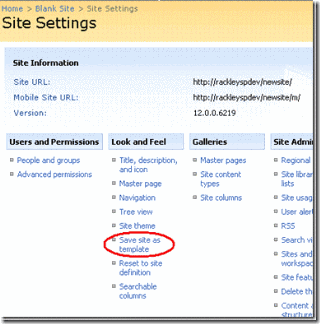
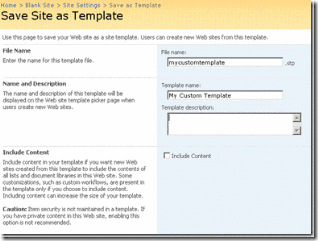
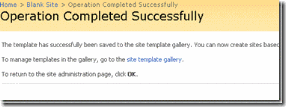
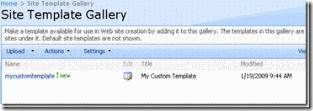
Okay, so far so good. Now all you have to do after you customize your site is save you site as a template. This is where I ran into my first “opportunity”. Here are two ways to save your site as a template.
Save Site As Template in SharePoint
|
|
|
|
|
|
|
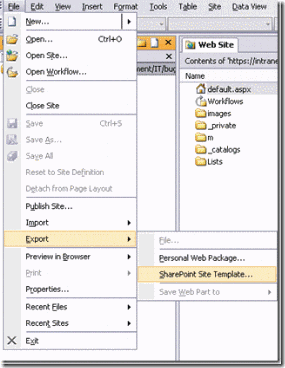
Save Site As Template in SharePoint Designer
|
|
|
Step 3: I ATTEMPT To Use My Saved Template
This is where the fun starts and I ran into a couple of more “opportunities”. I’m sure this is documented very clearly somewhere, but one of my skills is NOT “reading directions thoroughly before jumping in”. Here are the steps I ended up taking.
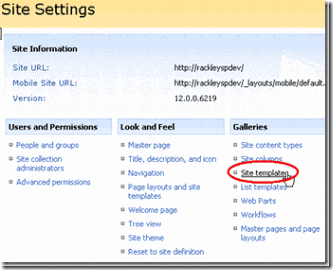
|
|
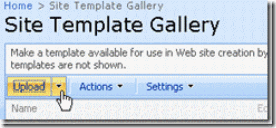
|
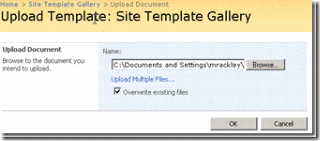
|
|
Alas, this is NOT how things worked for me. I followed all the steps above and when I got to the previous step I did not HAVE a tab labeled “Custom”. Logic tells me I didn’t have something installed that I should have. This is where one of the pro’s need to leave feedback and say “All you had to do was add this update and you would be all set”. Did I mention my aversion to reading directions completely? I’m impatient!!! So! I took matters into my own hands and here is what I did to get that pesky custom tab to appear:
Step 3.1: I installed ApplicationTemplatesCore.wsp
Apparently our farms did not have the Windows SharePoint Services 3.0 Application Template: Application Template Core installed. So I though “aha! That’s why I don’t have the ‘custom’ tab.”
So, I clicked on the link above, downloaded the ApplicationTemplatesCore file and installed it as follows:
1) I saved and uncompressed ApplicationTemplateCore.wsp on my SharePoint server.
2) From the command line, I browsed to the location of the wsp file and entered these commands to deploy the wsp file:
- stsadm.exe -o addsolution -filename ApplicationTemplateCore.wsp
- stsadm -o deploysolution -name ApplicationTemplateCore.wsp -allowgacdeployment -immediate
- iisreset
I thought for sure I had the problem solved and by installing this I would now have the option to use this elusive custom tab. So, I go to create a new site, go to the list of templates and WHAT?!?!! still no freaking Custom tab! At this point I was singing the praises of SharePoint and reflecting on how blessed I am to have this as my future. Again, I’m sure some reading would have come in handy here, but no! I’m just THAT stubborn.
Step 3.2: I installed one of the Fab 40 WSPs
“Okay, so.. what am I doing wrong here?” I wondered aloud as people came by my office to make sure I was not about to go postal. So, I did a couple of quick google searches and didn’t find any relief. I decided to go ahead and see what would happen if I installed one of the Fab 40 SharePoint templates. I figured it couldn’t hurt and we should at least have these on our Dev server anyway. Here is what I did:
1) Saved and uncompressed Windows SharePoint Services 3.0 Application Templates: All Templates to my SharePoint server.
2) From the command line, I browsed to the location of the uncompressed files and entered these commands to deploy ONE of the wsp files:
- stsadm.exe -o addsolution -filename <name of wsp file>.wsp
- stsadm -o deploysolution -name <name of wsp file>.wsp -allowgacdeployment -immediate
- iisreset
I wasn’t holding out much hope, but I thought I’d go and try to use my custom site template again. And guess what?? When I went to create a site, the Custom tab was now available with my custom site template listed as an option!! Now, wasn’t that easy?
Step 4: I Successfully Create a Site Using My Template
If everything else is working properly, just follow the steps above and choose your custom site template as the template for your new site. When I was doing this I created a site with a SPD workflow. The SPD workflow was deployed without issue when I used the above steps to save the site as a template and redeploy it.
Site migration in SharePoint is becoming more and more critical to our organization and SharePoint brings along a lot of its baggage making it even more of a challenge. As I come across and hopefully conquer these challenges on more complicated applications I’ll be sure to let you know what happened and how we solved the problem.
Lastly, I’m fairly certain I should not have had to gone through the hoops listed above to use my custom site template. If anyone out there knows what the problem was I would appreciate the feedback so I can address it properly in the future.
As always, thanks for stopping by and thanks for the feedback.
Families in Germany who are facing divers health problem, such persons can buy drugs from the Web without prescription. With the market flooded with divers web-sites selling sundry medicaments, purchasing medicines from th WEB is no longer a trouble for common man. Certain medications are used to treat infections caused by dental abscesses. Of course it isn’t all. If you’re concerned about erectile heartiness problem, you probably know about Xenical and Hoodia. Probably each adult knows about Garcinia. (Read more PhentermineXenical). The symptoms of sexual health problems in men switch on impossibility to have an hard-on sufficient for sexual functioning. Certain medications may add to sex drive difficulties, so its vital to cooperate with your soundness care professional so that the prescription can be tailored to your needs. Preparatory to taking Levitra or other medicament, speak to your dispenser if you have any allergies. Talk to your soundness care provider for more details. Preparatory to ordering this remedy, tell your physician if you are allergic to anything.
![clip_image008[1] clip_image008[1]](http://gwb.blob.core.windows.net/soyouknow/WindowsLiveWriter/ACompleteMoronsGuidetoDeployingaSimpleSi_E601/clip_image0081_f30d485e-9f84-40cb-af7e-3819440851b8.gif)
